Friday, August 11, 2017

Review: Custom Carter DSMB Float

Introduction

I wanted an auto-inflate DSMB Float (see here for more info) as a security device in case I got a cramp and needed help getting back to the surface. I also thought it could come in handy if I need to pull a big fish out of under a rock or even to mark a spot so that I can go rest a bit at the surface but still find it later.

While researching DSMB floats I came upon this post, it got me thinking that I needed a setup like his because I have a tendency to get cramps at times and this could happen to me too.

I finally narrowed my choice down to:
They both had good reviews but I settled for the Carter Float for the following reasons:
  1. It is quality hand made by James Carter; who makes heavy-duty lift bags to bring sunk boats up, for example.
  2. It has a 25 lbs (~11 kg) lift (using a 38 gram CO2 cylinder)
  3. He could custom make one for me with 2 CO2 inflators
They both have:
  1. On way oral/manual inflation valve (useful if you are out of CO2 and have to use the float as a emergency flotation/signalling device)
  2. Safety relief valve to vent out excess gas to prevent unsafe internal pressure

General Impressions

I take it with me each time I go spearfishing, it fits snugly on my weight belt on my back and does not bother me at all. It is very well made, the material is tough and of quality; it will not puncture easily and having the safety relief valve will keep it from popping when you go up (due to the change in water pressure).

Here is a picture of the inflated float standard float with one CO2 cylinder; it is not my picture because I didn't want to inflate it on land:
The reason I wanted two CO2 inflators on mine is that since I travel mostly by plane to spearfish I am not able to fly with a CO2 cylinder (due to airline safety regulations) . Since finding a 38 gram cylinder is not easy, I decided to use two 16 gram cylinders instead; these can be purchased in any store that sells bicycle supplies/most sports stores.

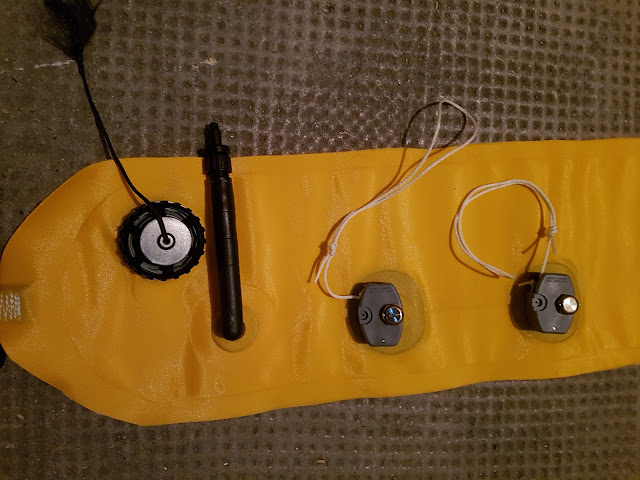
Here is what my float looks like:


Since I wanted to put it on my weight belt I needed a holder for it, I got the Riffe Utility Float Holder which works great:


I will add some pictures of my full setup next time I use it.

Safety Device

I suggest trying it out in situations where you may need it so that you understand how it works and its limits.

I have tried inflating it twice, once in a mock emergency situation with my dive buddy and once alone.  In the mock emergency situation with my dive buddy (both of us with our weight belts) it wasn't much help, there was just too much weight. Alone it worked much better and if I had dropped my weight belt (I must unclip the Carter float first) it would have been even better. I tried it as an emergency flotation device and it works well, I recommend dropping your weight belt if needed though. I have not tried flagging a boat with it (for the obvious reasons).

Underwater Marker

I have not tried it as an underwater marker yet, I wanted to be able to partially inflate it with a CO2 cylinder so I devised a setup using the float's oral inflation valve, an adapter (that I still need to work on) and a micro CO2 bicycle tyre inflator with a control value:


I will update this part once I finish it and try it out.

Catch Lifter

I have not yet needed/tried to use it for this, I will update this when I do. 


Conclusion

I am very happy with it, I think it is an important piece of equipment to have with you; I feel safer with it on me. I would recommend getting something like this if you can. If this is too pricey for you you can try buying a simple Surface Marker Buoy (SMB, aka Safety Sausage) and rigging it with an adapter and an on/off bicycle CO2 value, but I wouldn't risk it personally.

Sunday, June 18, 2017

Review: SporTube Series 2

Introduction

I used to travel with my gear in regular luggage (and I still do occasionally), but at some point I wanted something dedicated that allowed me to travel with regular spearguns and spearfishing fins, so I decided to look at what was out there (see my Traveling with you gear post) and settled on the SporTube Series 2.


Specifications


  • Adjustable height between 122cm to 212cm
  • Width: 28cm, depth: 15.2cm, Weight: 5.45kg (without handle & lock)
  • Linear size (for airlines) between 165.2cm and 255.2cm, but I have never had an airline ask my to measure it or pay extra (other than the normal extra baggage fee). Mine is usually closer to the lower number.
  • Hard resistant plastic shell
  • Wheels for airport maneuverability
  • Lifetime warranty
  • Lockable

Build

The build is rock solid, I have no worries of my stuff getting damaged inside (as long as it cannot move around too much). I always take the spears out of the mechanism so it doesn't break (the mechanism). The wheels are also very though, I don't see them betting broken anytime soon.

Usage

I am able to fit the following (while keeping it close to the minimal length):

  • 4 spearguns
  • 3 knives
  • a 500g anchor
  • a big pump (for my Best Hunter Okipa II float), something like this.
  • a custom Carter float with it's belt attachment
  • a marseillaise belt
  • a 50m braided float line with its winder
  • 2 pairs of neoprene socks and gloves
  • a pair of fiberglass fins
  • 2 snorkels
  • other small misc. stuff

It is easy to use, tough; I do have some small issues:

  • The wheels are not very pronounced, so if the ground is not paved/flat then I usually have to carry it. That is one of the reason the wheels are to tough though. It also probably means that if you are shorter then you have to raise your arms a bit to make it roll, if not then it will just scrape the floor.
  • Since it travels as special luggage (like baby push-chairs/strollers), then it also has a tendency to be forgotten when there are connections, but this will happen with any special luggage.

Conclusion

I am very happy with mine and the size. As long as you can keep it on the shorter side airline should not bother you (at least not in Europe). If you get the series 3 it is much bigger and can fit much more, however it also looks more imposing and may be viewed as too big to be checked in as extra luggage by some airlines. Most airlines set 158cm as the max linear size so even the series 2 is technically too big but if you keep it short then I have never had issues with it. I think the smallest linear size you could get setup/have with on a series 3 is 180cm... Worst case they charge you are oversized/sports luggage.

Wednesday, June 14, 2017

Review: Breier 760B 'SG' fiberglass fins

Introduction

As mentioned in my fins post, I used to use "longer" snorkeling fins; they were cheaper, indestructible and fit in my luggage (along with my JBL Travel Magnum Combo Speargun & Pocket Bouy). At some point though, I decided to get "real" spearfishing fins and I settled for Breier 760B 'SG' fiberglass fins. It also coincides with my getting my SporTube series 2 which allowed me to travel with them during longer trips with friends.

About Breier

Breier is a small French company specializing in fiberglass and carbon fins. They make the blades themselves so they are not just re-branding like some manufacturers do. They also custom make footpockets and blades if you have special needs. They have various footpockets to choose from, not sure if you can ask them to use models they don have (I assume you can if you send them to them, maybe you can order them and ship to them directly, but you should ask first).

My footpockets

I outfitted mine with Seac Sub Motus footpockets (which they were kind enough to mail me so I could try one one first for the size; I paid for the S&H) which fit my foot type (thin). I also wanted them not to glue the footpockets to the blades and and with the Seac Sub they don do that.

I also wanted to add patterns to them (they have several to choose from in different colors); this is a paying option. I choose a lighter color on the bottom so it is easier to see me from the top, orange is still visible if you are not too deep (I don't go deeper than 20m) but you should get yellow if this is a worry for you. The red is because it disappears rather quickly and it just looks cool. Here is a picture of my fins:


Here are some pictures of the footpockets:


Why Fiberglass?

Some of you may wonder why I got fiberglass and not carbon fiber or polycarbonate? I have polycarbonate fins already, even thought they are not true spearfishing fins, and I wanted something that would allow me to progress and that is lighter. Carbon fiber is not good for the type of spearfishing I do, it is too fragile. I believe it is good for blue water but for shore, rock and reef spearfishing it is going to be damaged too quickly and I don't see where it would be better in those conditions. Be aware of how you kick off the bottom, if you push with your toes too much you can break your fins. I usually do a flat footed jump movement to get off the ground and then rotate and swill up.

Performance

I find that longer fins do help a lot with spearfishing performance-wise. I cannot really objectively say if fiberglass performs much better than same length polycarbonate fins, but I am quite happy with them. Keep in mind that they are lighter and have a good response (spring back) so it is bound to help. 

Conclusion

Like I said above, I am very happy with my fins, the build quality is very good, they fit well and I enjoy their performance. They are more fragile though, even if less so than carbon fiber so I am always more careful than with my old polycarbonate fins. They were a bit more expensive than off-the-shelf fiberglass fins but their quality and having them personalized makes up for the price IMO. I also am very sad though when I scratch the designs...

Wednesday, September 7, 2016

Imersion Neoprene protection for apnea fins

Introduction

I needed something thin to protect my fins from scatches and impacts when I travelling. I usually put my fins in my SporTube but even there they can get banged up by other gear. I set out looking for something light, thin and with some padding. I could only find:

  • Proper fin bags: too big for my needs but they have padding at least
  • Thin plastic fin sleeves: thin but they have no padding
  • The Imersion Neoprene Protection bag: seems to have it all, so I got this.

Build

It is build from black, lined, 3mm "ultra-soft" neoprene. It stands up to the description quite well in real life. It is 90cm x 25cm and my Breier 760B SG Fins fin perfectly inside:


The neoprene is very soft and stretchy as advertised. It has a handle build in, this is handy not not essential. What is nice is that it is carved into the sleeve so it does not ad extra bulk:


The back part has Velcro to hold it closed:


Conclusion

This is a nice and inexpensive product, it does a good job protecting my fins from dents while inside my SporTube, I recommend it if you have the same needs.

Friday, September 4, 2015

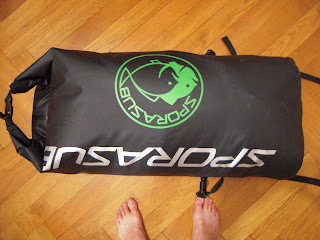
Review: SporaSub Dry Backpack

Introduction

I was looking for a new backpack to put my gear in since my old one broke. I was unable to find one like it (thick netting material, long enough for my fins, that can fold up), the ones currently on the market are not long enough. I need it to fold up because when I shore dive I cannot leave my bag behind so I need to be able to fold it up small and put it on my Best Hunter Okipa II float. I then found that SporaSub makes a dry bag that is a backpack AND long enough for freediving fins (dimensions (h x w x ?) are 109cm x 41cm x 21cm, not sure what the 21cm are though, maybe the top when it is closed?); I figured that I can also fold it up and put on my float, worst case if I need the room for other stuff it can even be tethered to the buoy and float next to it. Salvimar also makes a dry backpack too ("Dry Backpack 60/80"), but the old model was not long enough and the new model virtually has the same name ("Dry Backpack 60" and it shares the exact same model number) so I was afraid that ordering on online websites I would see the old model instead (many had a mix of the old name & new dimensions new name & old dimensions, etc). The Salvimar bag has removable straps that allow you to use it as a duffel bag and it is a bit wider (dimensions (h x w x ?) are 110cm x 44cm x 28cm). I liked the extra width but was afraid the strap attachment area being smaller that it made it more fragile; the SporaSub bag has a much wider attachment area since it is like if you take a padded backpack back and glue it to the dry bag. The Salvimar I think can fold up more since it doesn't have the padding part. I was also not able to find any good reviews on the Salvimar bag and the ones I found were on the old model. For all those reasons I went with the SporaSub bag.


Build

The build is ok, I am not sure how much weight it can take as the bottom looks like it is only glued. I think they should have stitched the seams for strength and then glued it tight:


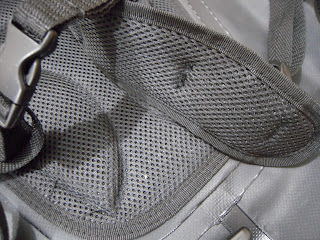
The fabric is thick however, it is a type of flexible rubbery plastic covered cloth. The straps are ok, the back padding is nice so you don't have anything poking in your back and it also feels better than the plastic material against your bare back as it is made in one of those breathable materials:

The strap and back welding seems good thought, better than on the bottom:


The opening is like all dry bags except it has a male and a female clip on one side and a female clip on the other:


It has chest and  abdomen attachment straps to help secure it so it doesn't sway around and it makes it nicer to carry:


Usage

It works as advertised, I am able to fit my 87cm (total length) freediving fins, my wetsuit, gloves/socks, my float and it's pump, my net, the float line and anchor, my mask and tuba, a sandwich and some water, an insulated bag with an ice pack, a short rock speargun or even a 75cm speargun with the spear (110cm) off of it (the spear sticks out a bit). The straps and back are comfortable, more than expected, I could see myself carrying it a while with no issues, even in the sun.

With all of the stuff described above, including a short cave gun
I had one issue though and I think it is a defect, the abdomen straps have each a male clip:


On the videos I clearly see them having one male and one female clip so you can clip them together. I used it to my advantage though, I added a female clip to one side but kept the male clip:

When I need to fold up the back I just role it up and use the male clips to attach to the female clips on the top to secure it all:


When it is folded up I can still put my t-shirt, swimsuit, water shoes inside (the sandwich I put in another small dry bag) and it is still small (and water tight). I still think the Salvimar bag would have been a bit better to fold up though (and roomier). I am not sure about the build since I have not seen it physically, but if it is stitched and glued then it may have been better than the SporaSub bag, but too late now.

It is ok to carry around as a backpack, not so much as a duffel bag though (my previous bag, like the Salvimar bag also, you could do both). Also I miss having a small pocket in the front and a money pocket inside, but I guess this is not really what a dry-bag is for. I will simply buy a small bag and put it inside.

My previous bag was netted with a bottom drain so the water flows out (so you don't carry it around), it dried quickly (Nylon), while you are walking your gear dries a bit (and the water drips out) but when you had wet things inside, especially a wetsuit, it dripped in the car trunk. This new bag, being a dry bag, it is the opposite, it keeps the trunk dry (but you have to carry around the water so make sure to get as much excess water off your gear), the gear does not dry at all inside and the bag itself needs to be thoroughly dried inside after use.

I no longer carry my weight-belt inside the bag since the bottom looks like it could come undone with the weight, this means that either you need to put it on (I don't like having lead against my skin when I sweat and I always wonder if it can seep inside me) or carry it in your hand (which limits the amount of longer spearguns you can take (you can in reality put them all in the bag, the tips will just poke out), the number of fish you bring back if you carry them outside the backpack, and since you may no longer have any free hands it can limit the type of path you take.

Conclusion

It is not bad a bad product, it does what it was made to do and it is very comfortable to use. I happen to have different needs so I cannot put much blame on the bag. I am disappointed on the glued construction, stitches should be used IMO for a bag especially since glue ages not so well and it usually breaks apart when you are using it... I am not sure if I would recommend this product just yet. I would really like to compare it with the Salvimar Dry Back Pack (60/80, 2015 or 2016 model).

Update

I have used it a couple of times now and it is quite good. The glue has not undone yet, the padded back is nice when you have lots of stuff inside and the shoulder straps are comfortable. I still do not know how well it will age, but only time will tell. I would still like a carry handle on the side to carry it like a duffel bag sometimes.

Sunday, August 23, 2015

Fins

Introduction

Fins are an important part of spearfishing gear, I would say that they are, with the Mask, (Snorkel/Tuba), and the Spearfishing Apparatus, the most important gear. Any other gear you could live without and still spearfish (omitting laws & personal comfort). The fins are what will allow you to move in a fast, safe and fluid manner in the water; they also allow you to dive down in an easy way. Without fins a strong current could take you away, you could not move around under water easily to hunt and to dive down you would need a weight attached to a rope and a boat to allow you to go down fast and bring up the weight after each dive or a bottom anchor and a rope to climb down for each dive. Generally speaking your down time would be horrible and it would be very hard to spearfish like this.

Types of Fins

There are many types of fins:
  • Snorkling
  • SCUBA
  • Freediving/Spearfishing
  • Underwater hockey
  • ...
The most common are the top three, in that order, I will not mention the forth type.

Scuba Fins

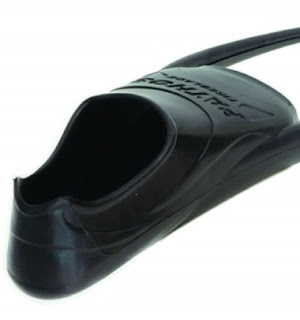
Scuba fins are usually open heal to allow booties to be used:

They vary in length and width and may have other gadgets/shapes to them; They are however usually wider to overcome the resistance from all their equipment and rather short to be less cumbersome. The footpocket and the blade are permanently attached together in the fabrication process. The blade is made of some sort of plastic. Power transfer is not optimal with the open heal and they can be painful without booties or socks. This is not an issue for scuba divers as they don't really need to swim optimally, they are too heavy and not streamlined enough for that anyways and they have a large external oxygen reserve so usually they do not worry so much about using the O2 in their blood optimally (I am simplifying things here). These fins are not very good for spearfishing (just as a reminder I exclusively speak of apnea spearfishing in my blog).

Snorkeling Fins

Snorkeling fins are light & flexible closed heel fins:


They vary in length and width and may have other gadgets/shapes to them. They are usually less wide and longer than Scuba fins, they are also softer. The footpocket and the blade are permanently attached together in the fabrication process. The blade is made of some sort of plastic. This type of fin is usually meant to be used without socks but you can use socks if you want. You can use these fins for spearfishing, I have used them for several years (my most recent being the Beuchat X-Voyager; this type of fin is cheap and if you get one with the right blade stiffness and long enough it is OK for shore/hole/reef/rock spearfishing. They may not be optimal but it will allow you to practice and perfect your technique.

Freediving/Spearfishing

These fins are long closed heel fins:


They vary in length but are much longer than the other fin types mentioned above:


The blade can be between 65cm and 85cm in length. The reason they are so long is that the blade's structure is linearly graded (thicker on one end and gradually getting thinner until the other end). This creates a leaver effect which give the fin a ratio between the energy the freediver has to give and the effective energy the fin generates is greater than any other fin type. This means that you use less O2. The footpocket is much stiffer than for other types of fins; this is to maximize power transfer (leg to blade). The footpocket and the blade can either be are permanently attached together in the fabrication process or separate. The separate type can be fixed permanently or modular; modular fins allow you in theory to buy a footpocket that fits you well/that you like and use blades from different brands, different materials, different stiffness, etc:

In practice not all blades fit with all brands, some footpockets have features that means only their blades will fit (Salvimar):

or make it difficult to fit other blades (Beuchat). Omer, SeacSub & Pathos seem to be the most generic. The blade can be made from different materials, I will talk about that later. They are usually meant to be used with socks but you can use them with socks if you want (if they fit and do not hurt your feet).

Freediving fins are however the most expensive types of fins, even the cheapest are more expensive than the expensive snorkeling fins. They are of course the best type for Spearfishing. I will exclusively talk about this type of fin from now on.

Parts

Fines are made up of two main parts, the footpocket:


and the blade:


The footpocket can either be open heel:

which are usually used with booties or socks The other type is closed heel:

Which are used it or without socks (but never booties).

The blade can be made of different materials (see below) and it can have some extra options (see below)

Footpockets

Footpockets can be made of one or several bonded materials; having different materials allows the footpocket to be reinforced in some places and softer in others with the aim of improving the mechanical aspects and comfort. For example the Cressi Gara Modular has a different material on the sides (harder) and in the middle (softer). You need to choose a footpocket that fits you well with socks, you can always use a fin keeper if they are a bit too big without the sock if you with to be able to not use socks at some point. The reason for using socks is more than just for thermal comfort, these types of footpockets are usually harder than snorkeling footpockets and they tend to have "sharp" edges which can cause a lot of pain. You could always trim or round them off a bit I guess if you really do not want socks, I have not tried. The footpockets have the part where your foot goes in, an opening in the front for the toes and to let water drain out, and "tendons", these are the long strips that extend on the front part. These have slots inside, usually in the shape of a 'T' for modular footpockets:


But not always:

The type without 'T' slots have to be glued with the blade. The blade slides in the tendon slots before sliding into the bottom slot of the footpocket:

The tendons come in different lengths and stiffness, this is important as it will directly impact the fin performance. For example a very stiff tendon and a soft fin means that only half the blade flexes correctly. I am not a specialist blade/tendon stiffness coupling so I will not be able to help much there, the best is to ask in specialized forums. Also, if the footpocket is too soft then energy is lost in the stretch, a bit like using a bicycle with suspensions in the city (you loose energy to the suspension). One last aspect, the most important, is the fit. It is hard to know in advance if it will fit correctly without actually trying it in water (with a blade in). First there are narrow footpockets such as:
  • Beuchat
  • Cressi
  • SeacSub
and wide:
  • Pathos
  • Omer
  • Mares
  • etc
The pathos being particular in the fact that you can put on a smaller size (with or without socks) and heat them slowly with a hair drier and they will actually mold to your foot (including the distinctive left/right match). I have never tried this but you can find videos and instructions on the internet. If you cannot find your fit or you want dual use (with or without socks), you can get finkeeps to help:


An often overlooked aspect is the bottom, if you hunt around rocks this part can be useful so make sure it is sturdy enough and has some sort of ribbing to keep you from slipping:

Blade

The blade is the other main component of the fin, it can typically be made with (in order of ascending price):
  • Thermoplastic
  • Fiberglass
  • Carbon fiber
  • Kevlar
It has a narrower end (with or without an angle) that slides into the footpocket. The other end can have different shapes depending on the manufacturer/model:

Thermoplastic Blade

Thermoplastic blades are like tanks: heavy but indestructible; they are also the cheapest type. They have their place, I don't think you should just to carbon because you think it is better (because it isn't necessarily better). While they are heavier, thus adding fatigue to your legs, they are usually still good. They are robust which is important to some people, it depends how you hunt. Thermoplastic blades will outlast other types, they can be scratched, bent, etc, much more than other types. They do have a "usage/bending memory" though, this means that the more they are bent in one way they will retain that angle a little each time.


Fiberglass Blade

Fiberglass (sometimes called fiber composite) blades are lighter and more responsive (they snap back better) than thermoplastic blades. They are also more expensive and more fragile than plastic. They are, with carbon fiber blades (see below) real linear graded blades. Plastic blades often use ribs to give the same effect but composite blades rely on the material itself. They do not have the negative type of memory like plastic blades have but have less of a positive memory than carbon blades.
"Ice" Fiberglass blades

Colored, can have patterns too

Carbon fiber Blade

Carbon fiber blades are lighter and more responsive than fiberglass blades. They are also the most expensive and fragile of blade types. They tend to snap (brittle) in an instant if you over-power them and if you scratch them they can delaminate. These should be exclusively used for boat based (blue water) spearfishing since you have no contact with rocks/coral. This type of spearfishing also fits well with this blade because the blade's full potential can be used. Carbon fiber has an "initial/resting state memory" meaning they will always want to return to their initial (flat) state; this means that it helps the freediver a little each time.


Just remember not to jump in the water from the boat with your fins on because they will probably snap.

In general I would suggest:
  • If you are a beginner, cash strapped, or hunt close to rocks/coral and do not want to be careful with your blades, get thermoplastic.
  • If you do mixed spearfishing (rocks + some blue water) or are careful with your fins, and you are not cash strapped, you can get Fiberglass blades.
  • If you solely do blue water spearfishing and money is no object, get carbon blades.
I do not recommend carbon blades if you do not practice blue water spearfishing. Some people swear by carbon no matter how you spearfish but I think this is wrong; each trade has its tools.

Kevlar Blade

Kevlar is a robust material with amazing tensile strength but it is a material which is quite hard to work with. Because of this, even though I have seen 100% Kevlar blades in the wild, it is mostly used in conjunction to other fibers, usually carbon. This makes it easier to work with and adds durability to carbon blades. It is typically either
  • directly woven (crisscrossed) with carbon, this creates an average blade and is the least interesting combination. These are often called "Carbon/Kevlar Hybrid" blades.
  • used as the core sandwiched in between carbon layers, this adds shear stress resistance to keep them from snapping. The carbon being on the outside layers the carbon fibers themselves do all the actual work. I will call these CKC blades.
  • used to protect a carbon core by sandwiching it in between Kevlar. This is used in an attempt to still have a lightweight and reactive fins but also resist high abrasion or abuse around rocks. This variant is they type that Danny (see comments section) calls "Rock Hoppers". I will call these KCK blades.
Kevlar does degrade quickly if exposed to UV rays so it must be used with a UV resistant resins if you want it to last. It can make it tricky to buy because you have to be sure/trust that the maker used these types of resins. Even if the correct type of resin is used you have to be extra careful to keep it out of sunlight when not in use. CKC blades are probably a good alternative if you want to try to have the performance of carbon but because of your leg strength/way of using them they snap. KCK blades are a good alternative if you want the durability of fiberglass but want better performance. 100% Kevlar blades would be a better alternative than Fiberglass per se but it is almost impossible to find due to being so difficult to work with it and thus the price vs advantage ratio (compared to Fiberglass) is too low to be worth the effort.

Composite Blade Stiffness Comparison

I found a nice comparison of various composite materials used to make blades:

Source: Penetrator Fins

You can read the whole post here. Also of interest is this page and this page. Although they are not specific to fins they give good information on the above composites.

Angle

Fins can have an angle going from 0° (flat) to about 30°. The "standard" for fins that have an angle is 15°-22°. The angle helps you do two things, it offsets the natural angle of your ankle & foot so that your kicks push more water and it makes the freediving negative buoyancy free fall smoother (when you no longer float up and your body glides through the water). If the angle is too high, above 25° I think, you will cut through the water instead of pushing it so you will be less efficient. Here are some examples:


Stiffness

The blade stiffness is an important aspect that must be carefully analysed. The softer a blade is the less tiring it will be to fin with at the surface but the harder it will be to go up to the surface from the bottom. The harder the blade is the more tiring it is to fin long distances on the surface but the easier it is to go back up from the bottom. The standard blade stiffnesses are:
  • Soft
  • Medium
  • Hard
some brands add to this:
  • Very Soft (LD/Long Distance)
If you have very strong legs you can go hard, but most people will use medium as an all around stiffness. Very soft fins are sometimes labeled "LD" for Long Distance by some brands, soft fins are very useful if there is strong current or if you have to fin long distances. It really depends on how and where you spearfish and how strong your legs are; as I said above you can choose medium if you are not sure or if you want something for most situations.

Rails

There are two types of rails:
  • Tendon rails: for the 'T' slot in the tendons (thus at the base of the blade):

  • Water channeling rails: channels the water better on the blade (thus at the end of the blade)
surface and prevents it from "slipping"

Thermoplastic blades either have this built in or not, fiberglass or carbon fiber blades have this as extras. The tendon rail is obligatory if you want modular fins, if not you can glue the blade in the footpocket and tendons. The water channeling rail is very useful to help you achieve optimal finning. Imagine pouring water on a blade without channeling rails, the water will spill off in every direction. Now do the same with the rails on, the water will be channeled in one direction. I am not sure if the channeling rails modify the mechanical properties of the blade much. In theory it should depending on the stiffness of the material used although I have not seen any tests on this. I would think that the gain from having them is largely superior to the loss but then again I have not seen them being used by many makers.

Have a look here at this great discussion on water channeling rails by Dan from the FreeDiveStore.

Technique

The finning technique is very important, some techniques are:
  • Frog kick: imagine a frog swimming; this is used mostly by SCUBA divers in caves or wrecks so they do not kick up sediments
  • Dolphin kick: imagine a dolphin swimming; this is like if you had a mono fin
  • Flutter kick: this is the kick swimmers often use, spearfisherman/freedivers use a variant of this
  • Bicycle kick: imagine how your legs move when you ride a bicycle; this is mostly used by SCUBA divers and should not be used by Freedivers/Spearfishemen!
Spearfishermen/Freedivers using freediving fins use a type of Flutter kick with slow, regular, stiff-legged kicks. If you try to Bicycle kick you will waist a lot of energy and not be very efficient. SCUBA/Snorkeling fins are shorter and stiffer so even with Bicycle kicks you move fin, but not so with Freediving fins!

Conclusion

Fins are indispensable, it is important to match you needs to the fins you buy as the price can climb quickly to $500 and above. As stated above, if cash is an issue then get either thermoplastic or longer snorkeling fins, they will be fine. I have a pair of "longer" snorkeling fins for traveling light or rock fishing in rougher waters and a pair of Breier 760B 'SG' fiberglass fins for everything else.

As always, if you have any questions or remarks, please don't hesitate to leave a comment below!